CSE5910 : Multimedia Programming in Java

Lecture : Graphics Programming 1

In the previous lecture:

In this lecture:


What is a digital image?

There are basically two types of images, Bitmap and Vector images.

Bitmap Images

  • Bitmap images are what you most often find on web pages or being produced by your digital camera.

  • They consist of a grid of coloured points called picture elements or pixels for short. These "sample" the light emitted from a scene so that if you stand back far enough, your eye is fooled into seeing a continuous image.

  • The pixel grid's dimensions are the image's width & height.

  • A bitmap image file is a means of storing information to retrieve the value of every pixel of the image.

  • Bitmap images often require a large amount of space to store all of the pixels.

  • Bitmap images may be edited interactively by specifying the value of individual pixels, or by painting pixel values in with a virtual brush.

  • As a programmer, you may create a bitmap image by specifying the colour value at each location in the pixel grid... you should program the computer to help you with the tedium of the task of course!
Web Spider Pixels
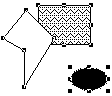
Enlarged, pixellated bitmap . If you look too closely at a bitmap image you can see the individual pixels.
Note: Sometimes black and white images laid out in a grid of pixels are referred to as "bitmaps" since they require one bit per pixel to specify.

It is simple but space hungry to write every pixel value into a file as a (Red, Green, Blue) triple.

Typically this takes 8 bits per channel (24 bits per pixel). If transparency (an alpha channel) is added to an RGB image we need 32 bits per pixel for Red, Green, Blue and Alpha (an RGBA image).

An alternative is to construct a colour palette for a particular image from the most frequently encountered pixel values in that image. The GIF image file format does this.

Each colour in the 256 colour palette takes 24 bits to specify but each pixel in the image can now be stored as a single 8 bit index into the colour palette.

An image and its GIF 256 colour palette. For this palette, 255=Black, 044=Red, 000=White.

Homework: Calculate the space savings for a few different image sizes using this encoding scheme.

Bitmap image compression

Image compression schemes may be lossy or lossless.

Lossy schemes

Lossless schemes

Skull image - captured using a camera.

skull lossless compression (GIF)

skull lossy compression (50% JPEG)

skull lossless compression (25% JPEG)

GIF 38kBytes (lossless*) 50% JPEG 4kBytes (lossy) 25% JPEG 2.5kBytes (lossy)

Spider image - synthesized digitally.

spider lossless compression (GIF)

spider lossy compression (50% JPEG)

spider lossly compression (25% JPEG)

GIF 15kBytes (lossless*) 50% JPEG 3kBytes (lossy) 25% JPEG 2kBytes (lossy)

Text image - synthesized digitally.


GIF (lossless)
JPEG (lossy)
This image is under very high
compression to accentuate
the edge artefacts.

* Footnote: GIF is lossless only if the source of the image has 256 colours or less!


Working with bitmap images in Java

Java graphics libraries include:

java.awt - the abstract window toolkit. An early, basic toolkit for using a platform's native GUI elements.

javax.imageio - classes for reading and writing bitmap images in JPEG, PNG and GIF.

Java AWT draws to the screen in a Frame and within it a Canvas or lately, with Swing, within a JFrame and a JPanel. In the program below we create a JFrame (that includes the window title bar) and within this we create a JPanel on which to draw (that doesn't include the window title bar).

A Java graphics context is the environment in which Java's graphics routines operate when drawing to the screen. A Graphics object is responsible for controlling this drawing to the screen within a graphics context. To use it, the Graphics object needs to be passed as a parameter to a paint() (or paintComponent()) method.

The paint() or paintComponent() method is not usually called directly by the programmer. It will be called automatically when the window is created, resized or uncovered. If a programmer wants to force a call to paint() they may do so by calling repaint() which requests an update of the window... and calls paint().

This simple program opens a window suitable for performing graphics and loads an image file into it for display. You could easily use such code to load a series of icons onto a map.

import java.awt.*;
import java.awt.event.*;
import java.io.*;
import javax.imageio.*;
public class ImageDisplayer extends JFrame
{
   public static void main(String[] args)
   {
      new ImageDisplayer();
   }
   ImageDisplayer()
   {
      super("Image Displayer");

      // Set up the window to receive a quit event that closes it
      addWindowListener(new WindowAdapter()
             { public void windowClosing(WindowEvent e) {System.exit(0);} } );
      
      // Set the size of the new JFrame
      setSize (300,300);
      
      // Place a new CanvasImageDisplayer (defined below) in the frame
      add("Center", new PanelImageDisplayer());
      
      // Make the new window visible
      setVisible(true);
   }
}
// Make a subclass of the JPanel
class PanelImageDisplayer extends JPanel
{
   // The paintComponent method of the canvas class is automatically 
   // called when the window is created or resized
   public void paintComponent(Graphics g)
   {
      // Get the dimensions of the JPanel so that if
      // the window is resized we can re-position the image
      Dimension d = getSize();
      int maxX = d.width - 1;
      int maxY = d.height - 1;
      String fileName1 = "tent.GIF";  // Java will read GIFs
      String fileName2 = "tree.PNG";  // Java will read PNGs (and JPEGs) too
      try
      {
         // Try to load an image from the file and display it
         // Note: the origin of the JPanel is the top left corner
         Image image1 = ImageIO.read(new File (fileName1));
         g.drawImage(image1, (int)(maxX*0.3), (int)(maxY*0.3), null);

         Image image2 = ImageIO.read(new File (fileName2));
         g.drawImage(image2, (int)(maxX*0.7), (int)(maxY*0.7), null);
      }
      catch (IOException e)
      {
         System.out.println("ERROR: " + e.getMessage());
      }
   }
}

The output displayed by the program above.

The addWindowListener() method in the code above takes an argument that is an object of a class implementing the WindowListener interface. One of the methods of this interface is a windowClosing() method.


Object-based / Vector images

  • Vector images are a collection of geometric shapes: lines; ellipses; rectangles; polygons. These may be edited interactively by moving control points, usually line mid / end points.

  • As a programmer, to create a vector image you will need to store the Cartesian coordinates of the shapes' vertices, information linking these vertices into edges, as well as the fill patterns, line and fill colours of your objects.

  • Vector graphics can be redrawn at any resolution since the exact coordinates of the shapes' vertices are stored and may be referred to for any recalculations that are necessary.


  • Vector images may have very small file sizes because it is not costly to store a set of shape types and parameters.
Vector graphics sample
Bitmap of vector image
(control points marked)

Working with vector images in Java

Java allows the programmer to draw vector images using standard graphics routines. Here we'll only investigate drawing 2D graphics.

import java.awt.*;
import java.awt.event.*;
import java.io.*;
import javax.imageio.*;
import javax.swing.*;
public class VectorDisplayer extends JFrame
{
   public static void main(String[] args)
   {
      new VectorDisplayer();
   }
   
   VectorDisplayer()
   {
      super("Vector Displayer");
      addWindowListener(new WindowAdapter() { public void windowClosing(WindowEvent e) { System.exit(0); } });
      setSize (300, 300);
      add("Center", new PanelVectorDisplayer());
      
      // You can change the cursor over the JFrame as you like... 
      setCursor(Cursor.getPredefinedCursor(Cursor.CROSSHAIR_CURSOR));
   
      setVisible(true);
   }
}
class PanelVectorDisplayer extends JPanel 
{
   public void paintComponent(Graphics g)
   {
      Dimension d = getSize();
      int maxX = d.width-1;
      int maxY = d.height-1;
    
      g.drawString("d.width = " + d.width, 10, 30);   // write a string to the display
      g.drawString("d.height = " + d.height, 10, 60);
    
      g.setColor(Color.red);                          // set the colour using predefined color objects
      g.drawLine(150, 120, 180, 140);                 // draw lines (start_x, start_y, finish_x, finish_y)
      g.drawLine(180, 140, 120, 140);
      g.drawLine(120, 140, 150, 120);
   
      g.setColor(new Color(120, 95, 200));           // set the colour using a programmer-defined color object
      g.fillRect(130, 140, 40, 30);                  // draw a filled rectangle (start_x, start_y, width, height)
   
      g.setColor(Color.green);
      g.drawLine(100, 170, 200, 170);
   }
}

The output displayed by the program above.

Homework: In addition to setColor(), you can call a Graphics object's getColor() method to get the current colour. Try it! The call returns a Color object. There are also routines getBlue(), getGreen() and getRed().


Generating bitmap files from vector graphics

After you've drawn a vector image, you can save it to a bitmap image file.

The process involves rasterisation of the vectors into pixels. This process also happens when the vector image is displayed on a raster display device (like an LCD or CRT monitor).

import java.awt.*;
import java.io.*;
import javax.imageio.*;
import java.awt.image.*;
// import the names of the image classes
public class ImageSaver
{
   public static void main(String[] args) throws IOException
   {
      int size = 300;
      
// Create space in which to store some pixels (a buffered image) // and create something into which to draw 2D graphics to place in the BufferedImage. // Graphics2D is a subclass of the basic Graphics class that provides extra functionality. BufferedImage image = new BufferedImage(size, size, BufferedImage.TYPE_INT_ARGB); Graphics2D g = image.createGraphics(); // Draw the house picture into the graphics object g.setColor(Color.red); g.drawLine(150, 120, 180, 140); g.drawLine(180, 140, 120, 140); g.drawLine(120, 140, 150, 120); g.setColor(new Color(120, 95, 200)); g.fillRect(130, 140, 40, 30); g.setColor(Color.green); g.drawLine(100, 170, 200, 170); // Save the image using the ImageIO routines into a png file File file = new File("ImageSaved.png"); ImageIO.write(image, "png", file); System.out.println("Saved image: " + file); } }

The output saved to ImageSaved.png by the program above.

This program demonstrates the basics of rendering into an image that is stored in memory (and not displayed on-screen). It also utilises Java's ability to write graphics files to disk. Explore the other methods of the graphics libraries in your own time. We'll look at drawing vector graphics in more detail in a later lecture.


Lecture summary:


CSE5910 Courseware | CSE5910 Lecture Notes